Add Chatbot to Your Wix Website
Option 1: Adding a Chat Bubble
Watch this Video to add Chat bubble to your wix website.OR
Follow the steps below:- Log in to your Wix account.
- Select the website where you want to add the chat bubble.
- Open the Wix Editor.
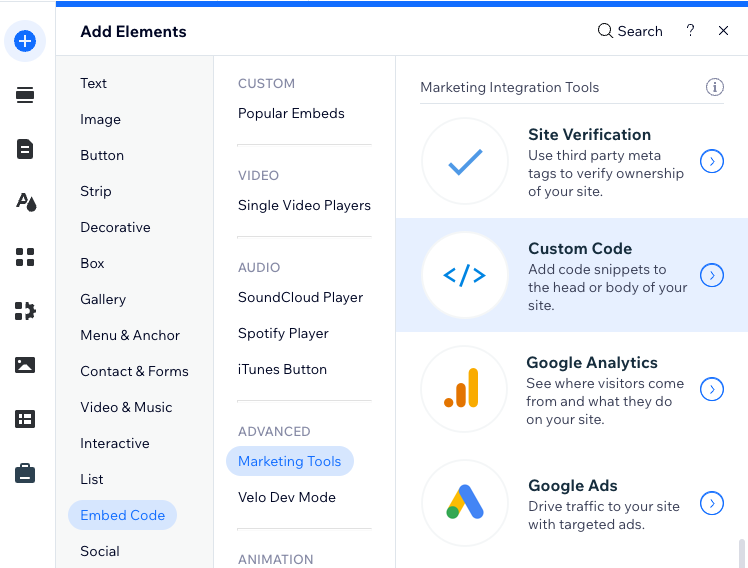
- Click on the Add button in the left-hand menu. Then select "Embed code".
- Select Embed code.
- Choose Marketing tools.
- Select Embed code.
Refer to the image below for visual guidance:
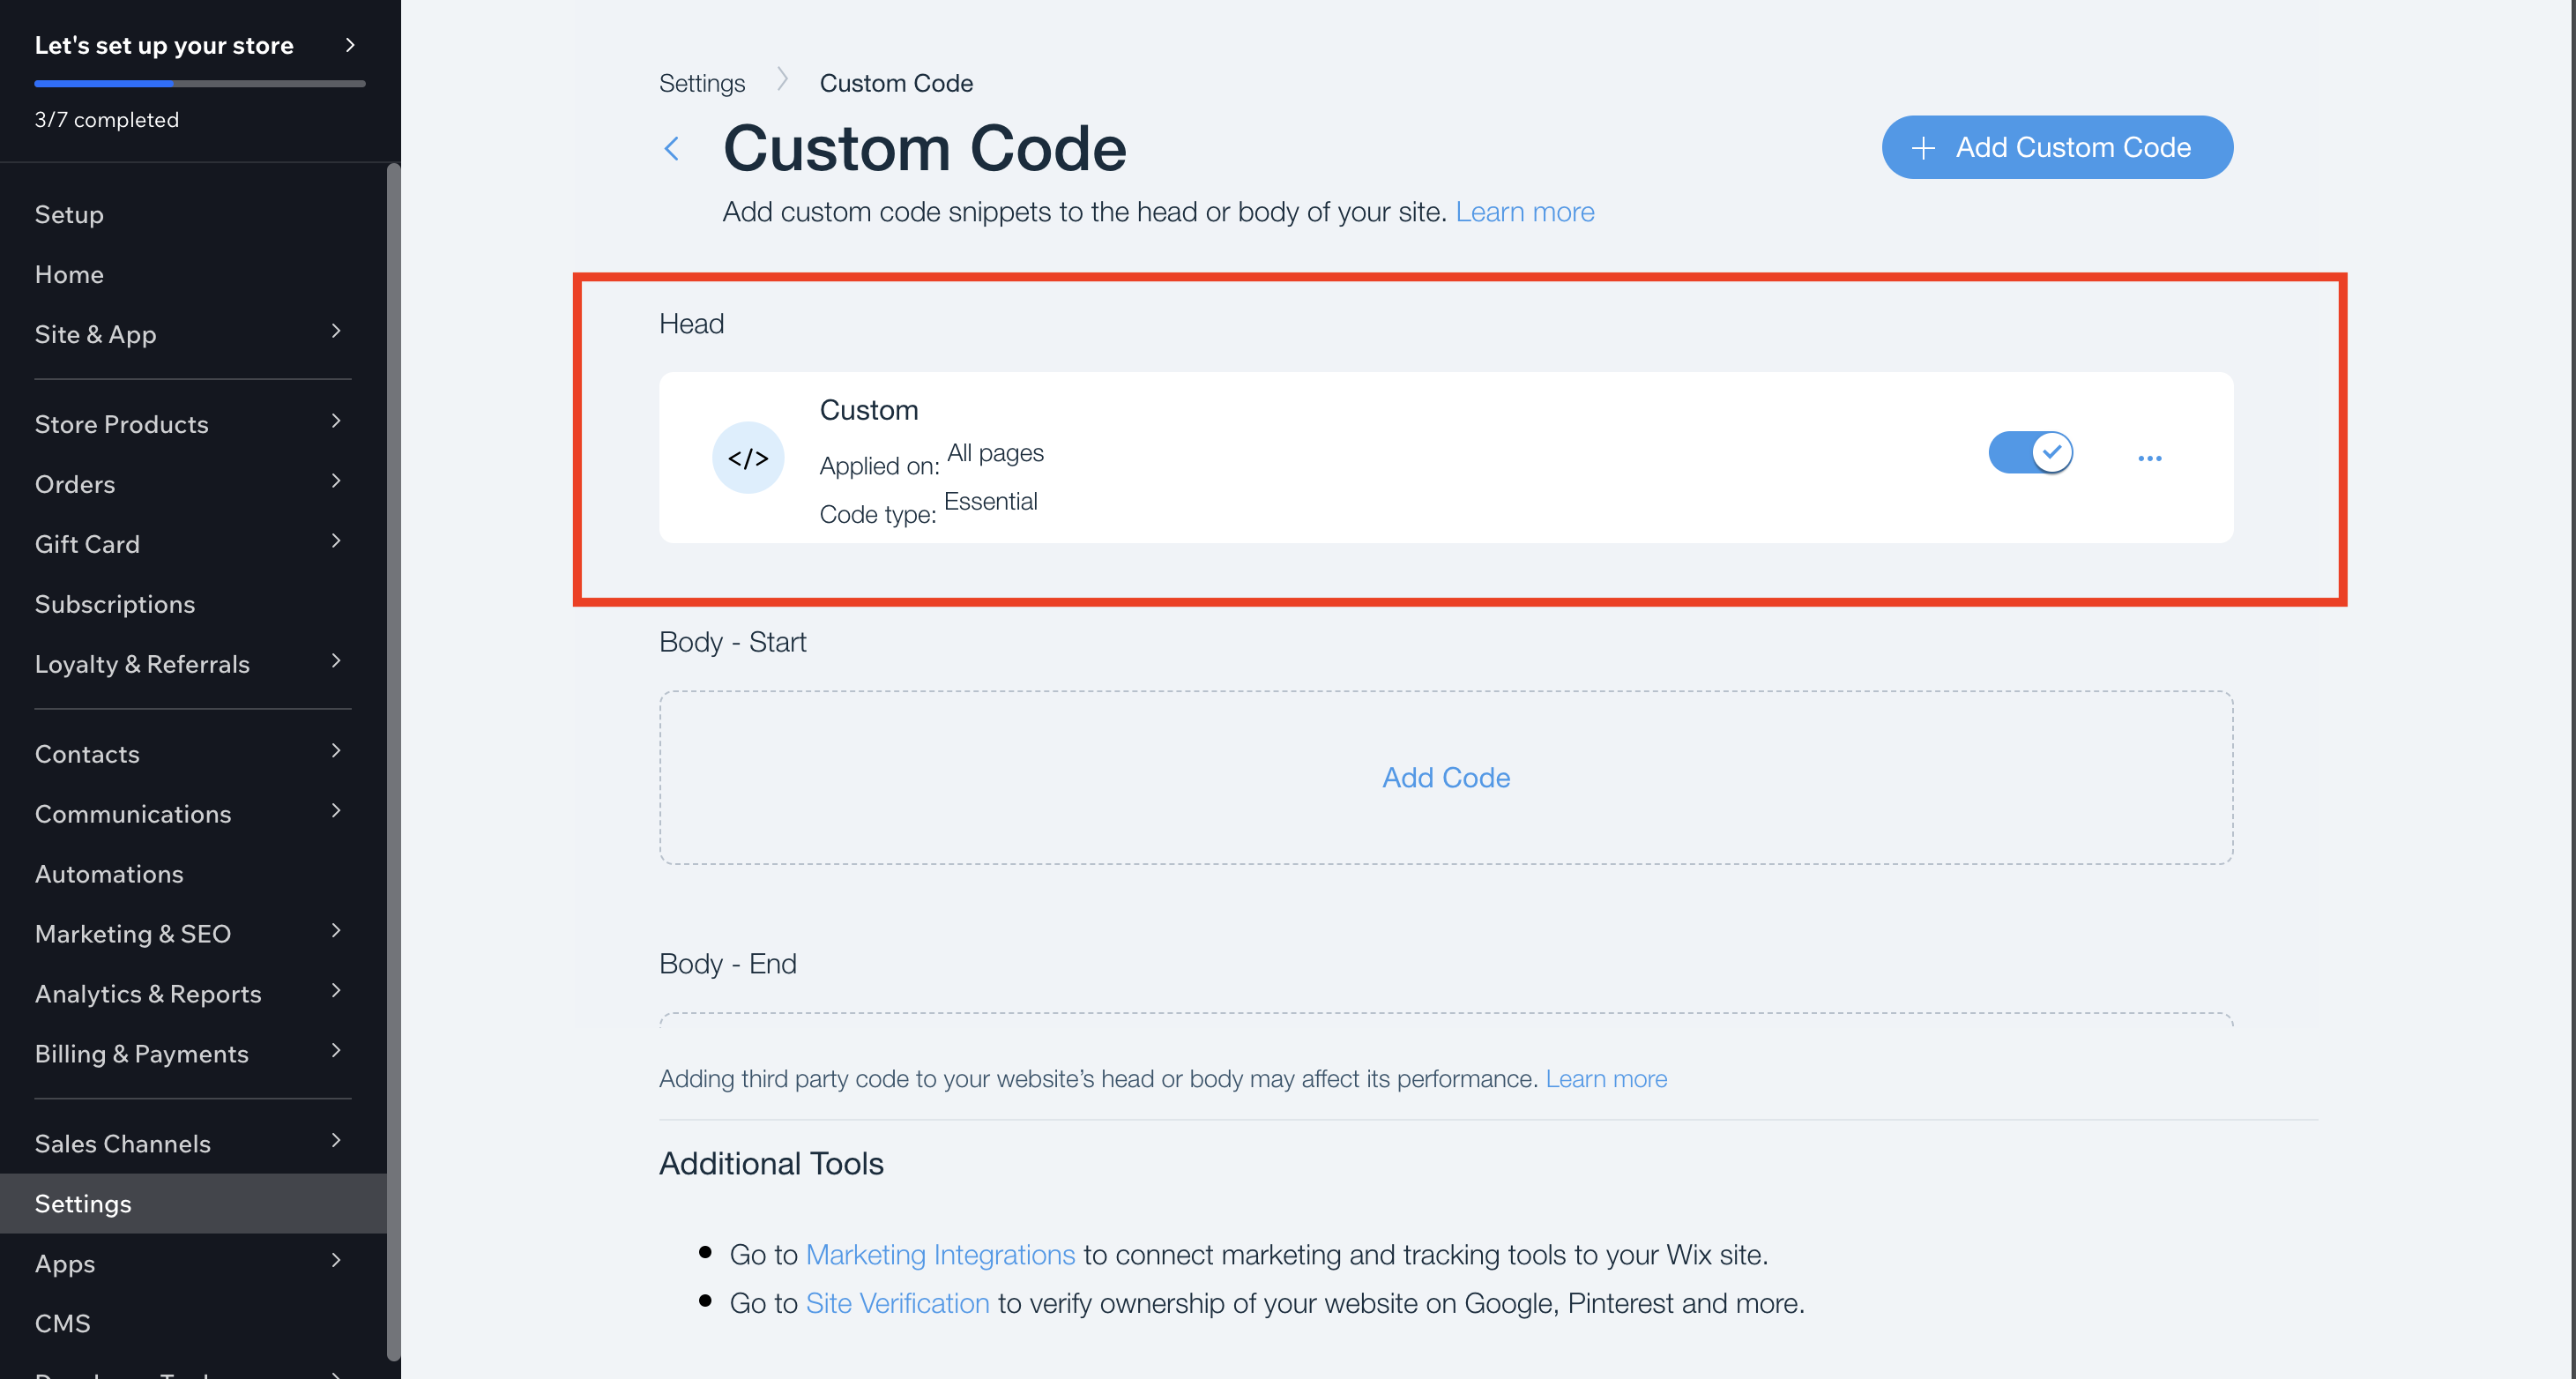
- Select Add Custom Code.
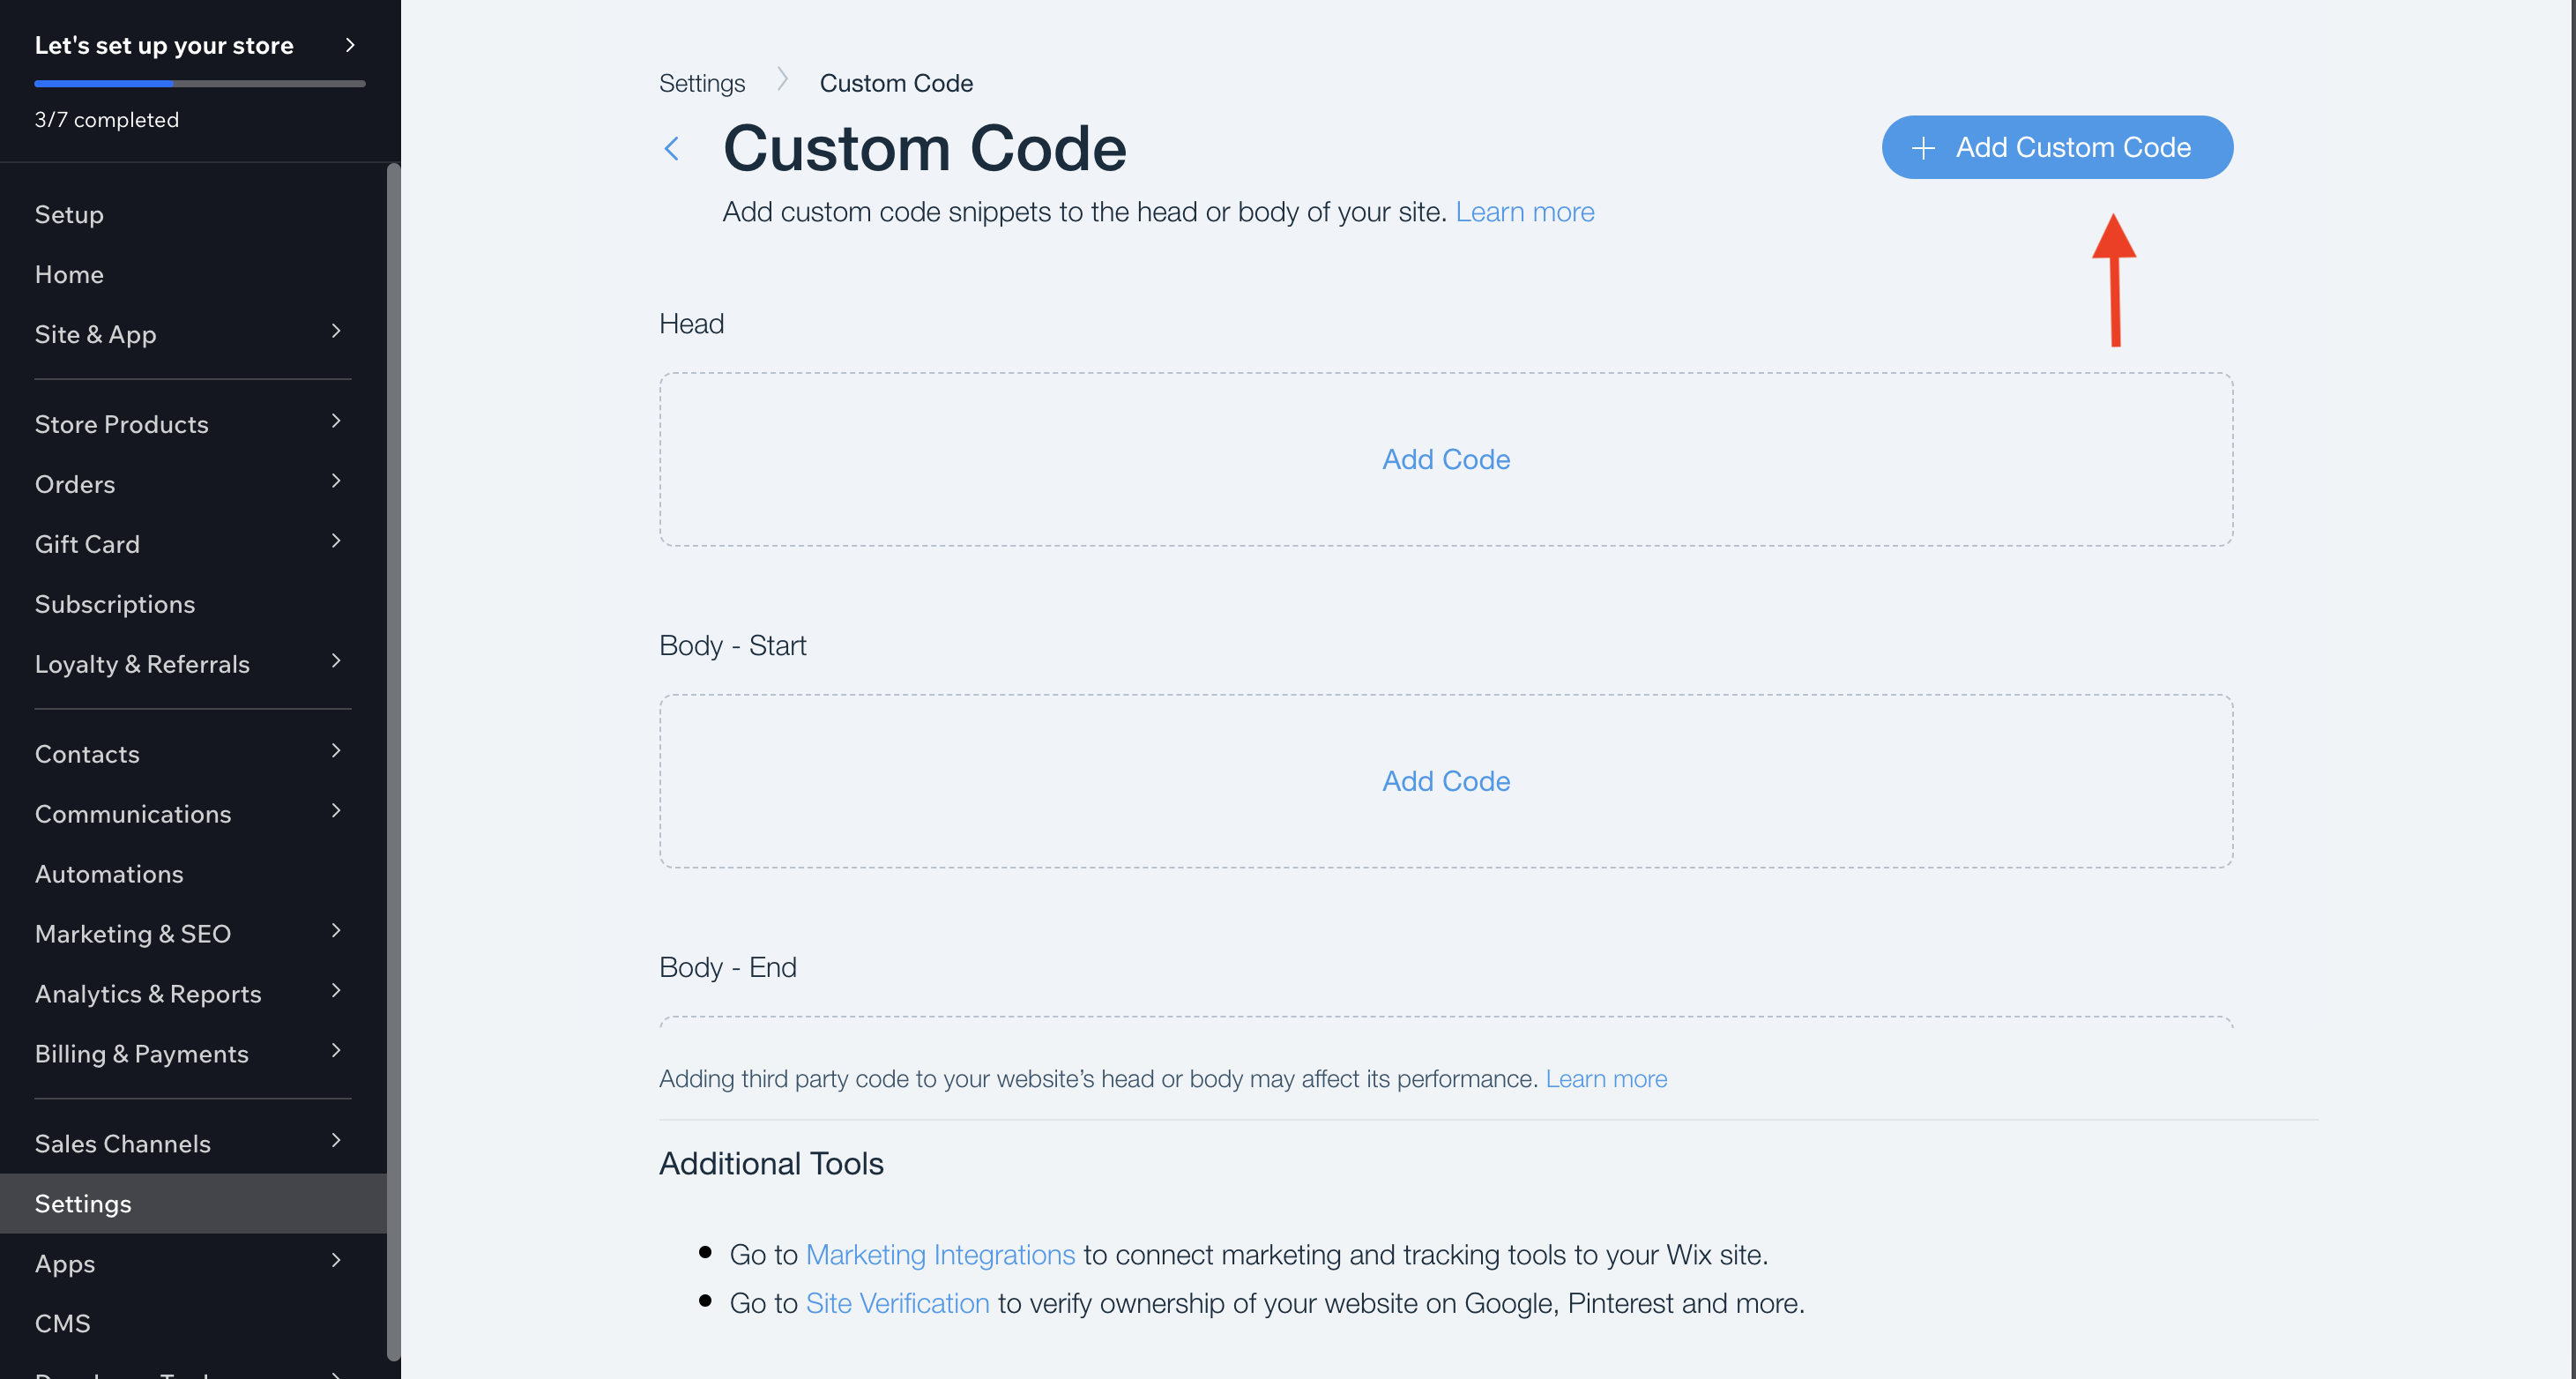
- Copy this Code. ChatBot ID can be found in General Settings of your Chatbot.
Click the 'Copy' button below to copy the code
<script
src="https://www.dialoggpt.io/embed-chatbot.js"
id="your-chatbot-id"
defer>
</script>
- Paste the Code into the section mentioned in the image below.
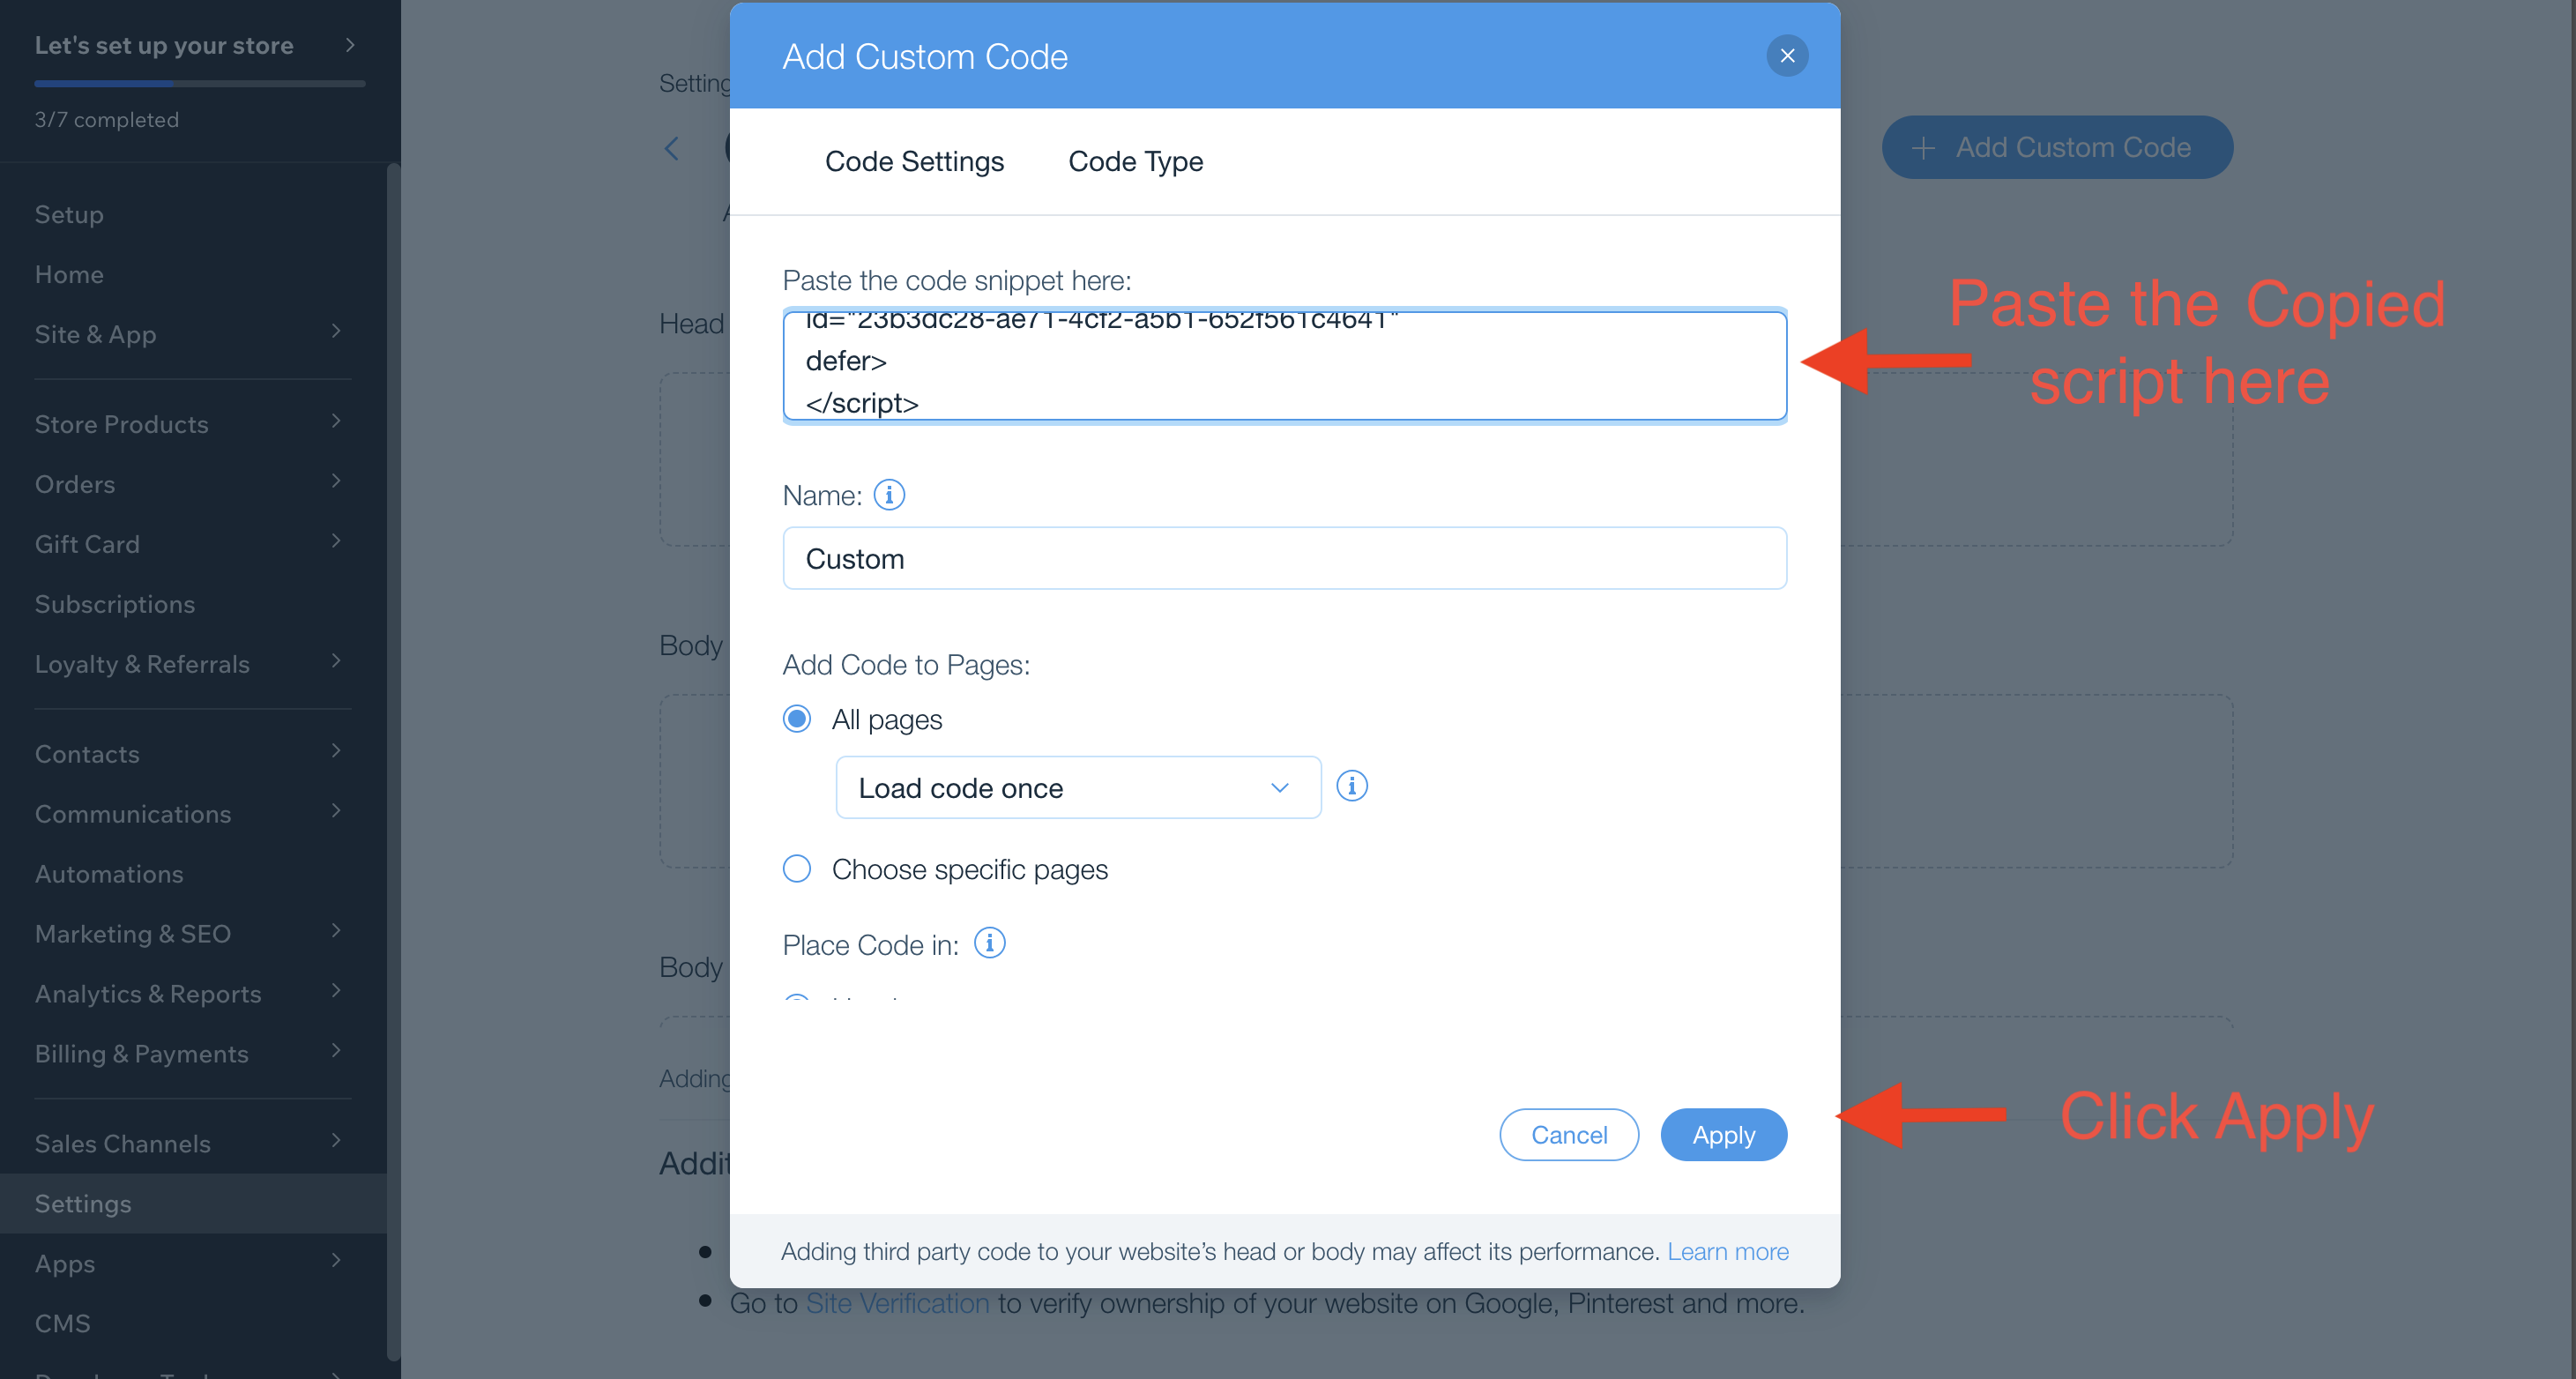
- Verify that the script has been successfully added.
- Finally, close the dashboard and publish the changes. You will now see the chat bubble on your website.
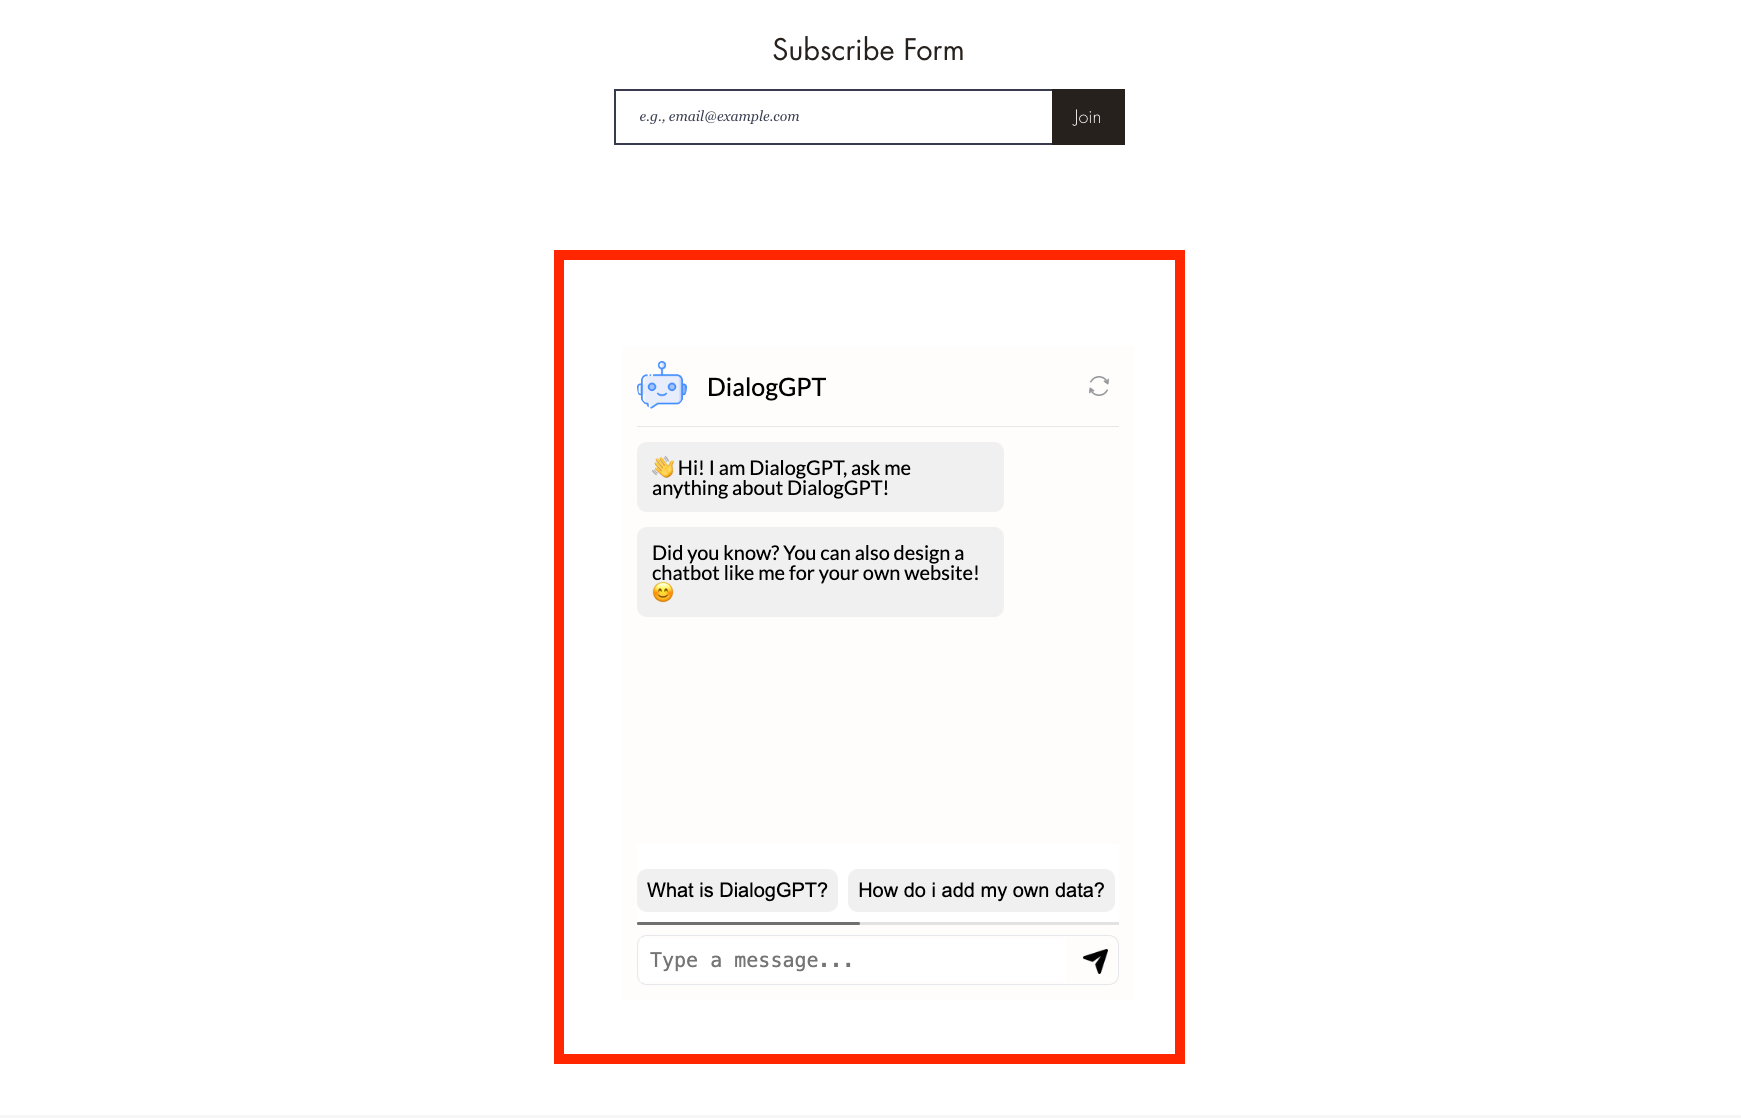
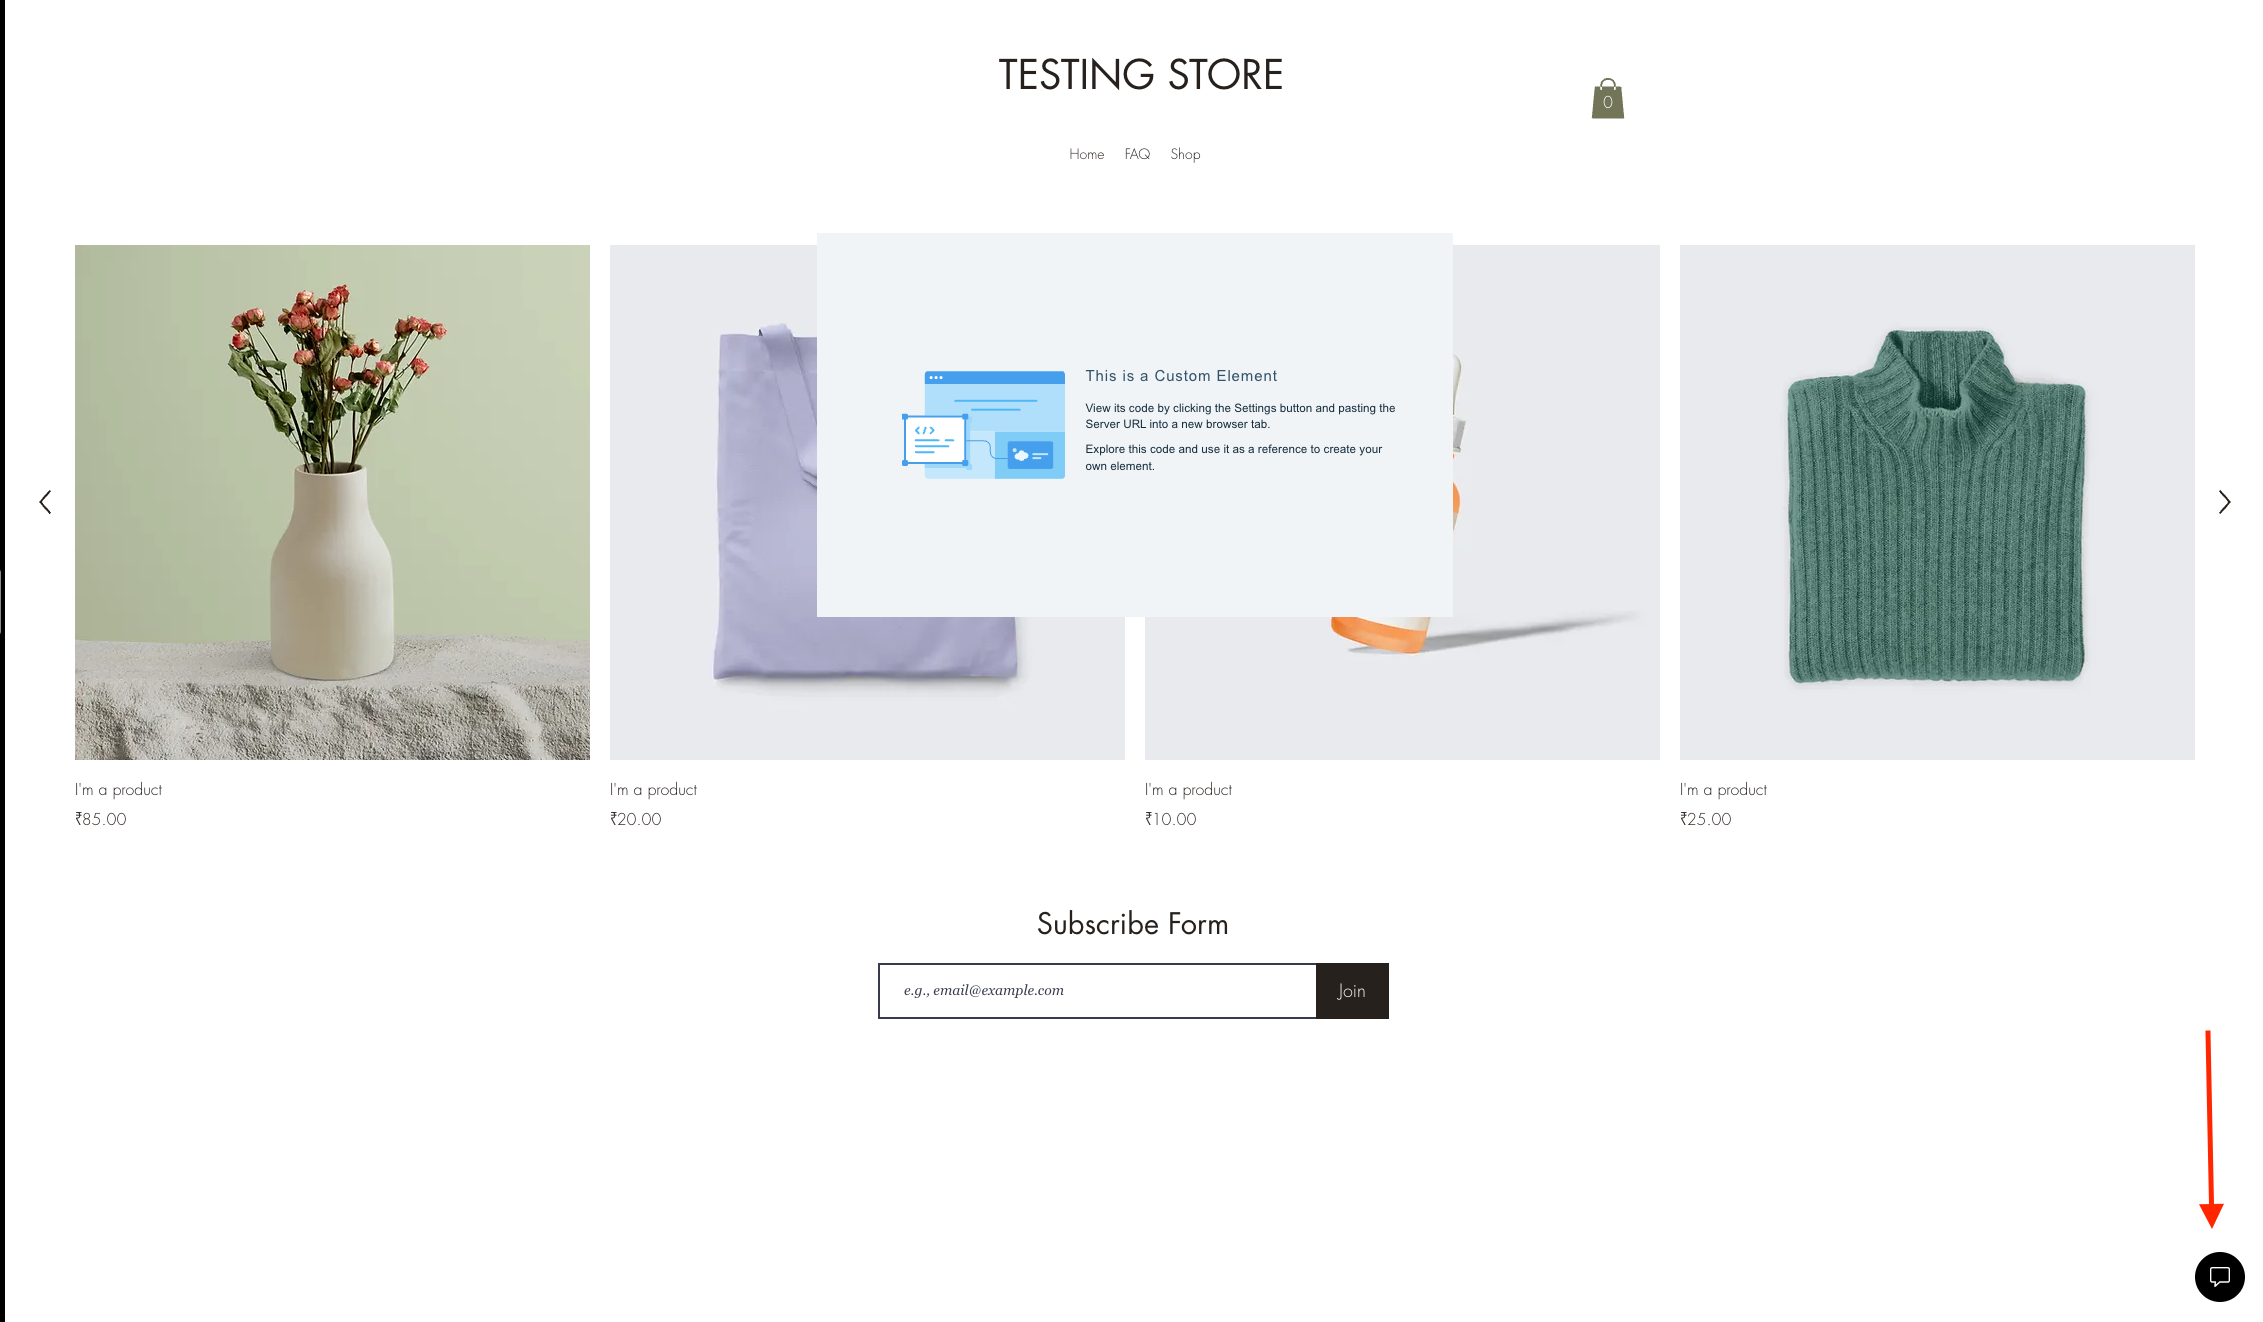
Here's how the ChatBubble will look on your website:
Option 2: Add the Chat Window Anywhere on the Website
Watch this Video to add Chat Widow Anywhere in your Wix website.OR
Follow the steps below:- Log in to your Wix account.
- Select the website where you want to add the chat bubble.
- Open the Wix Editor.
- Click on the Add button in the left-hand menu. Then select "Embed code".
- Select Embed code.
- Choose Popular Embeds.
- Select Embed HTML.
Refer to the image below for visual guidance:

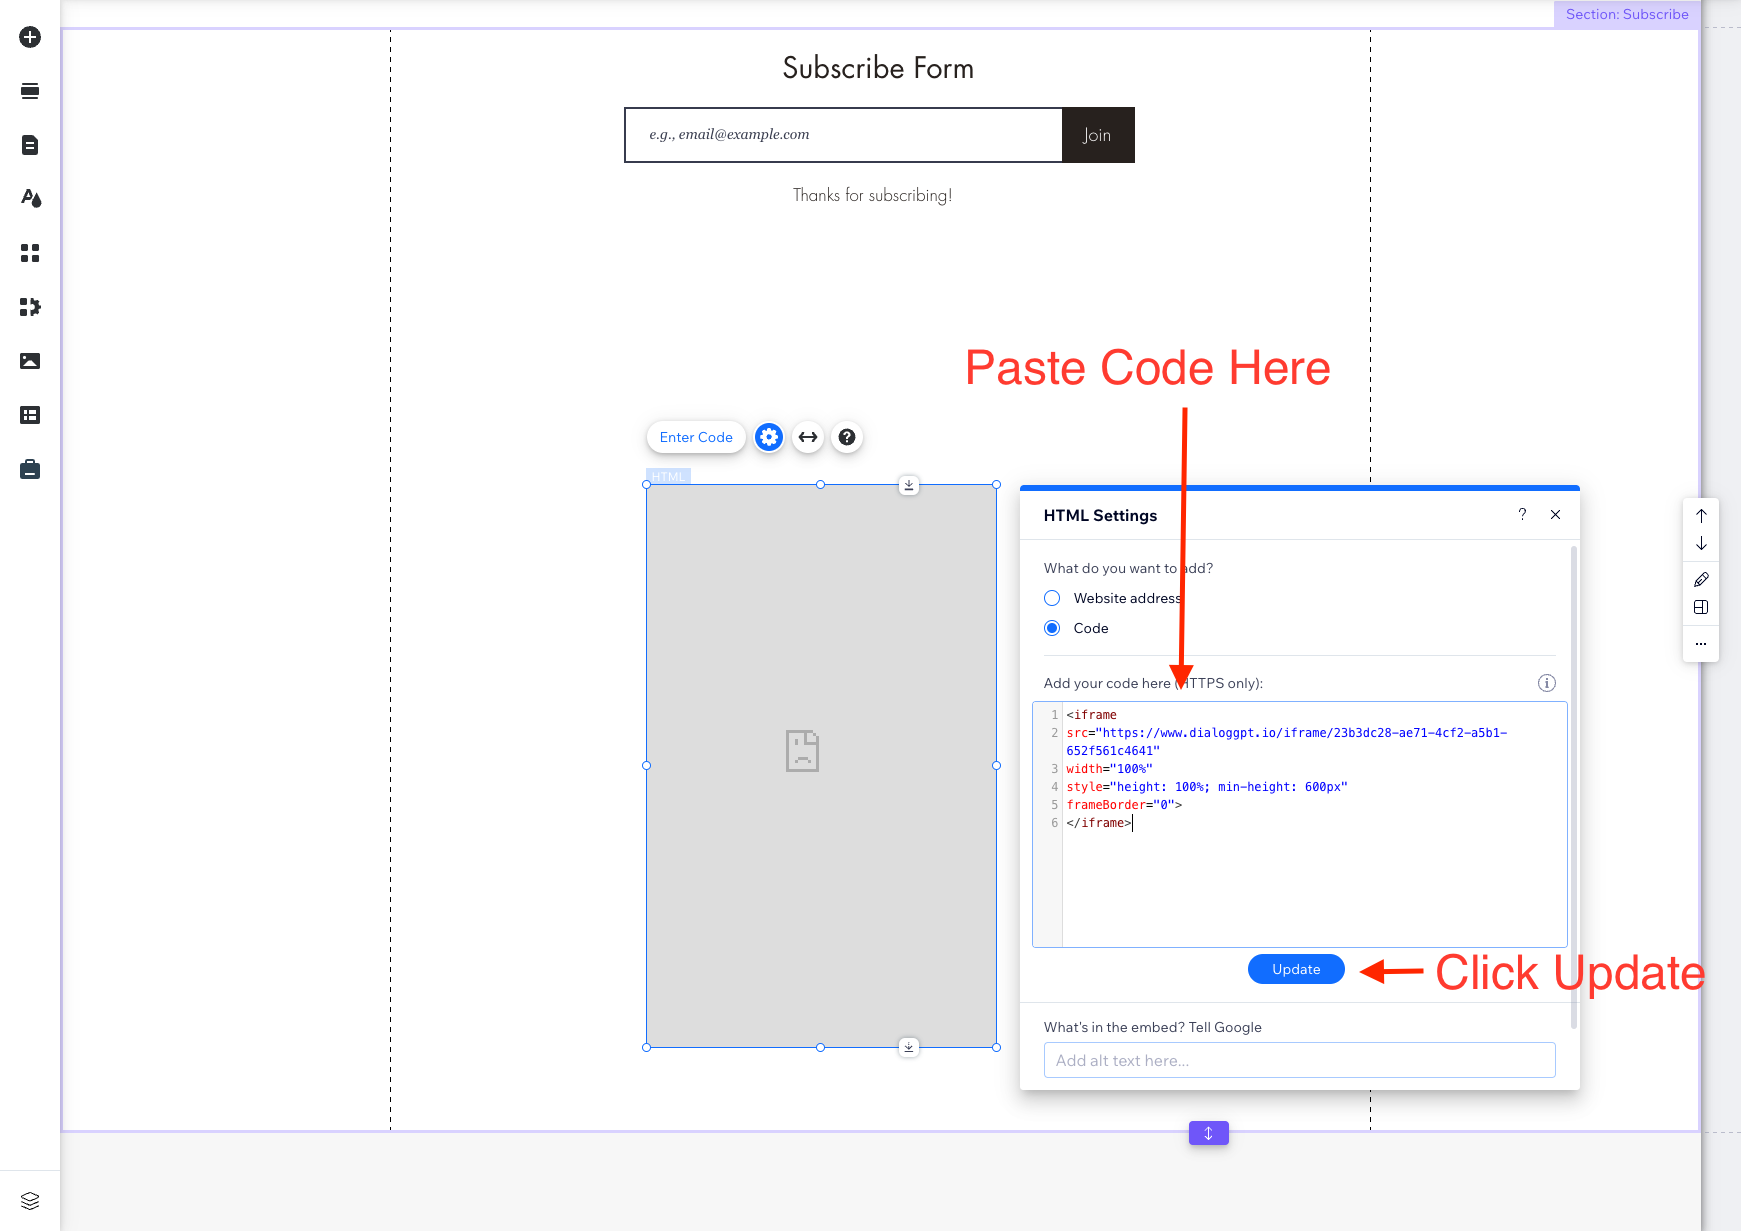
- Copy this Code. ChatBot ID can be found in General Settings of your Chatbot.
Click the 'Copy' button below to copy the code
<iframe
src="https://www.dialoggpt.io/iframe/your-chatbot-id"
width="100%"
style="height: 100%; min-height: 600px"
frameBorder="0">
</iframe>
- Paste the Code into the section mentioned in the image below. And Update!
Ensure there's enough space for the ChatBot:
- Finally, publish the changes. You will now see the chat window embedded in your website.
Here's how the ChatBot will appear on your website: